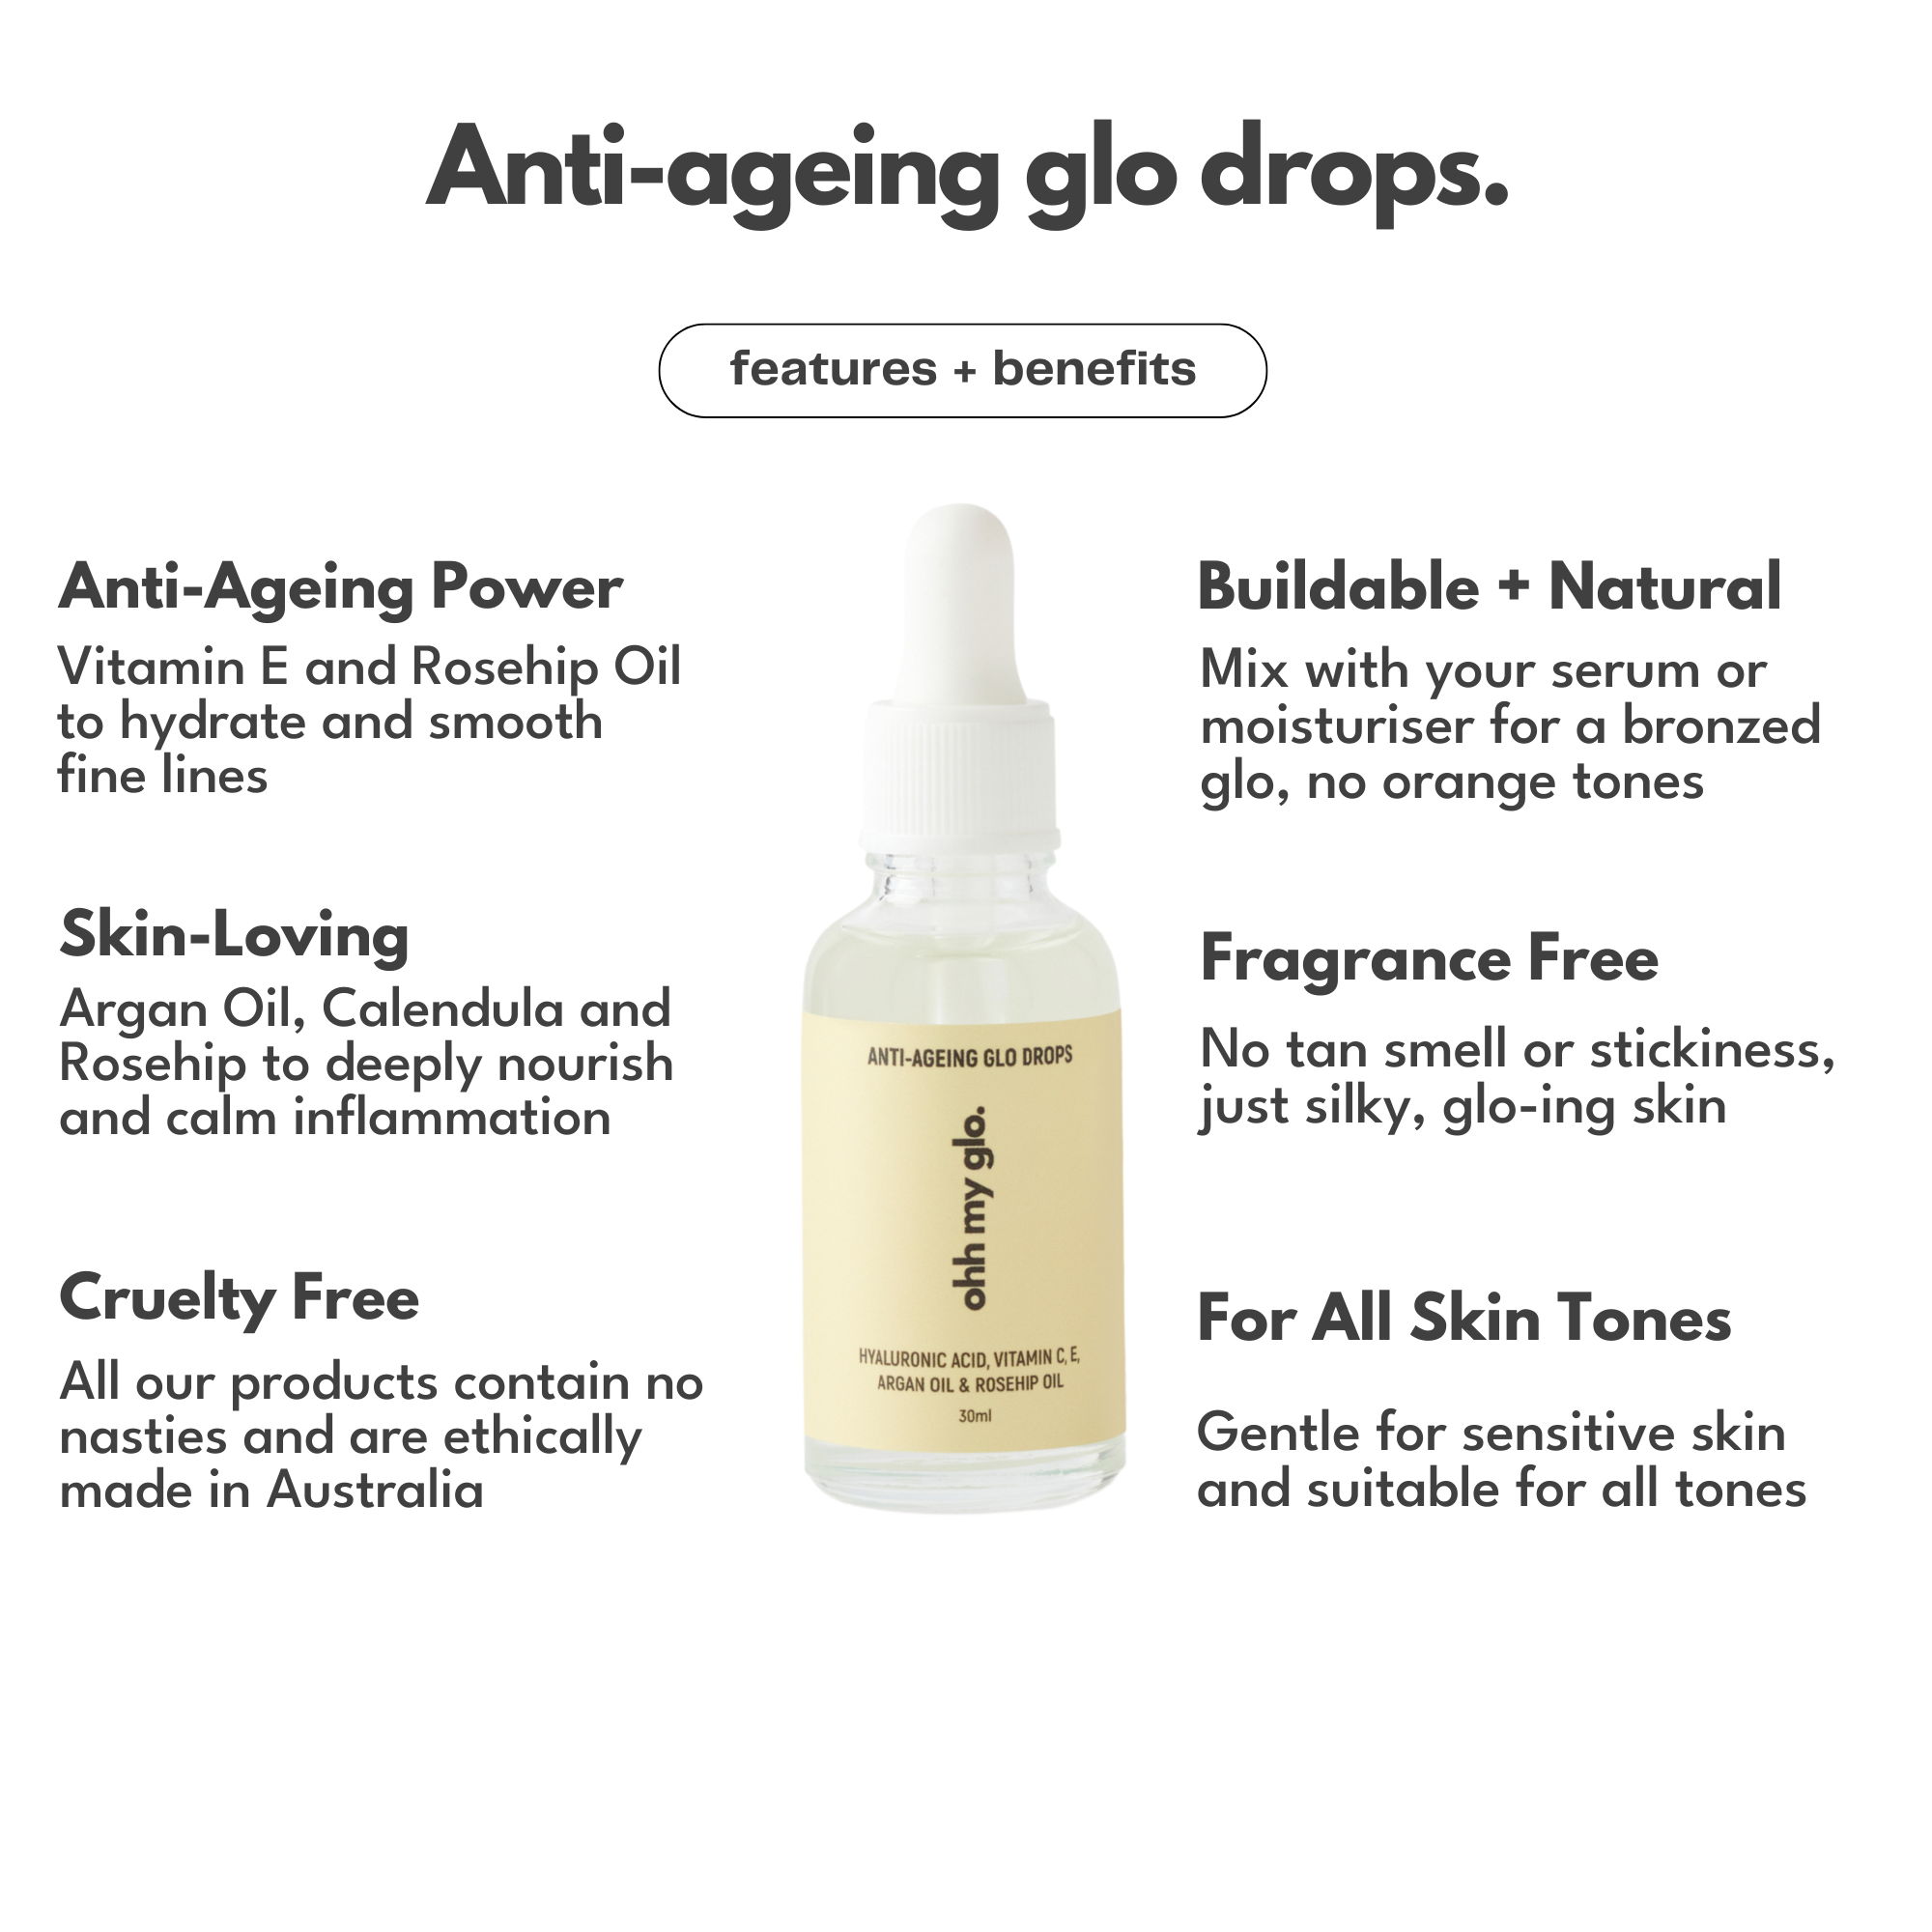
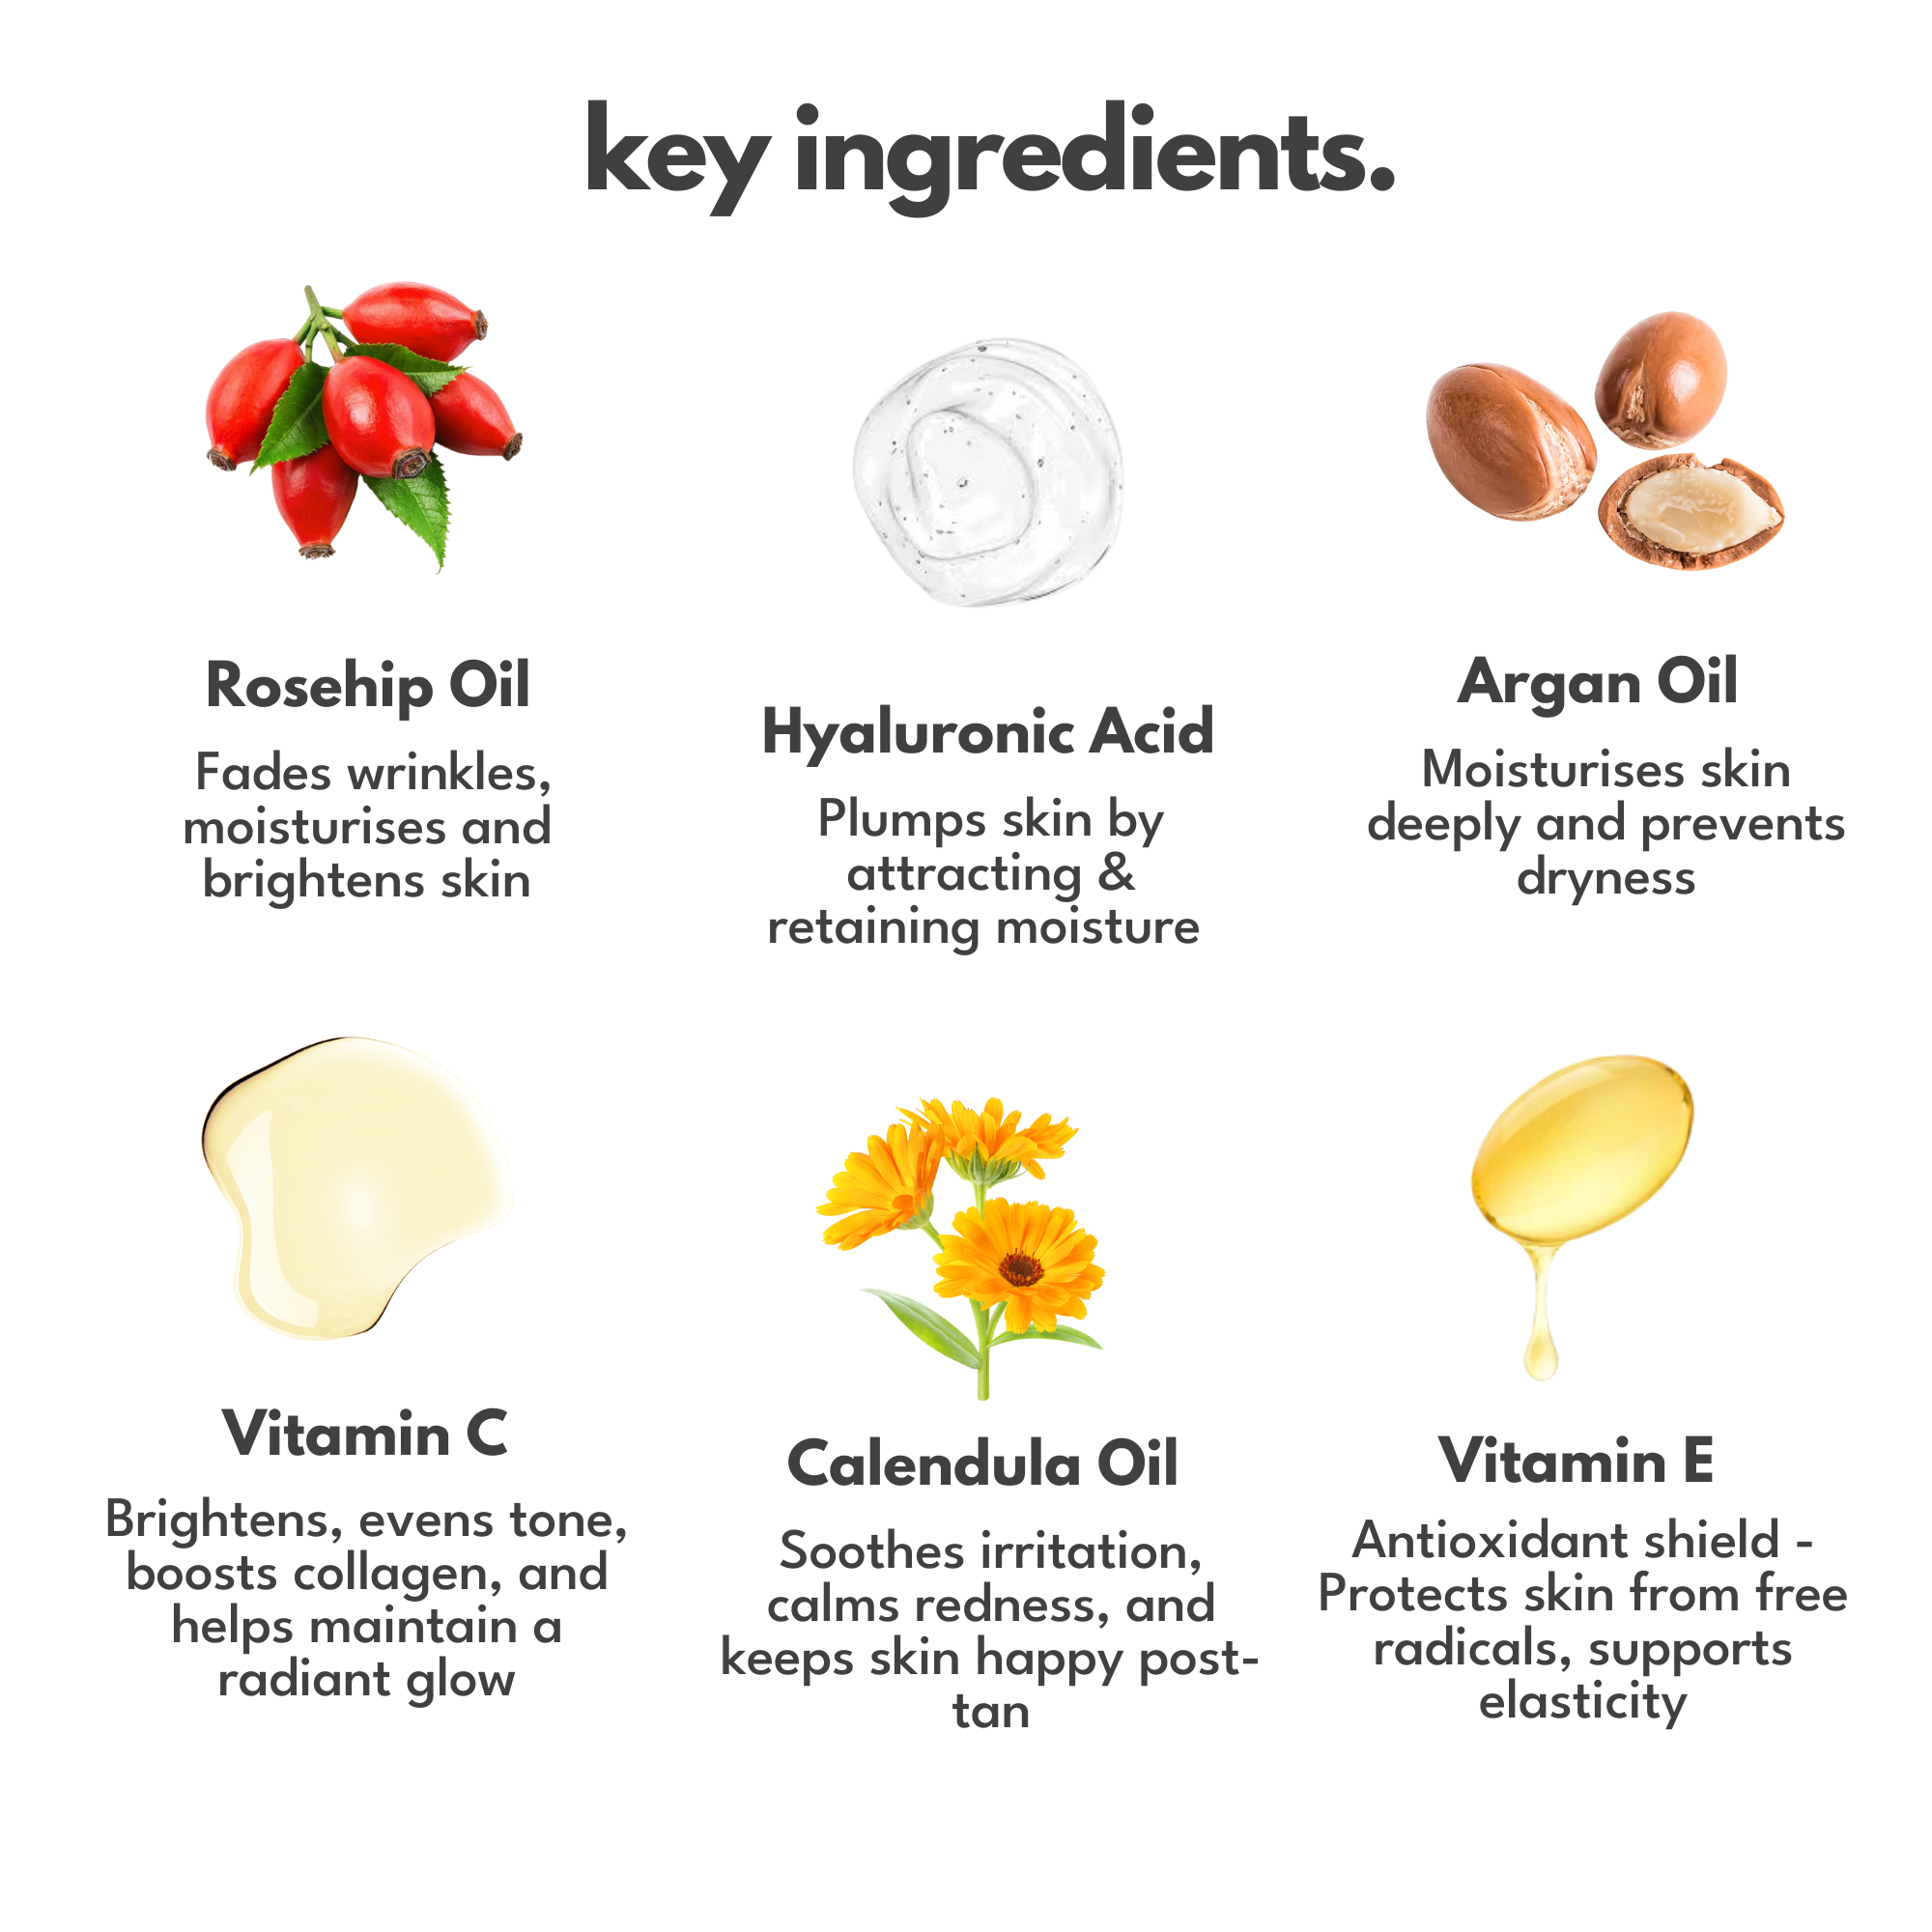
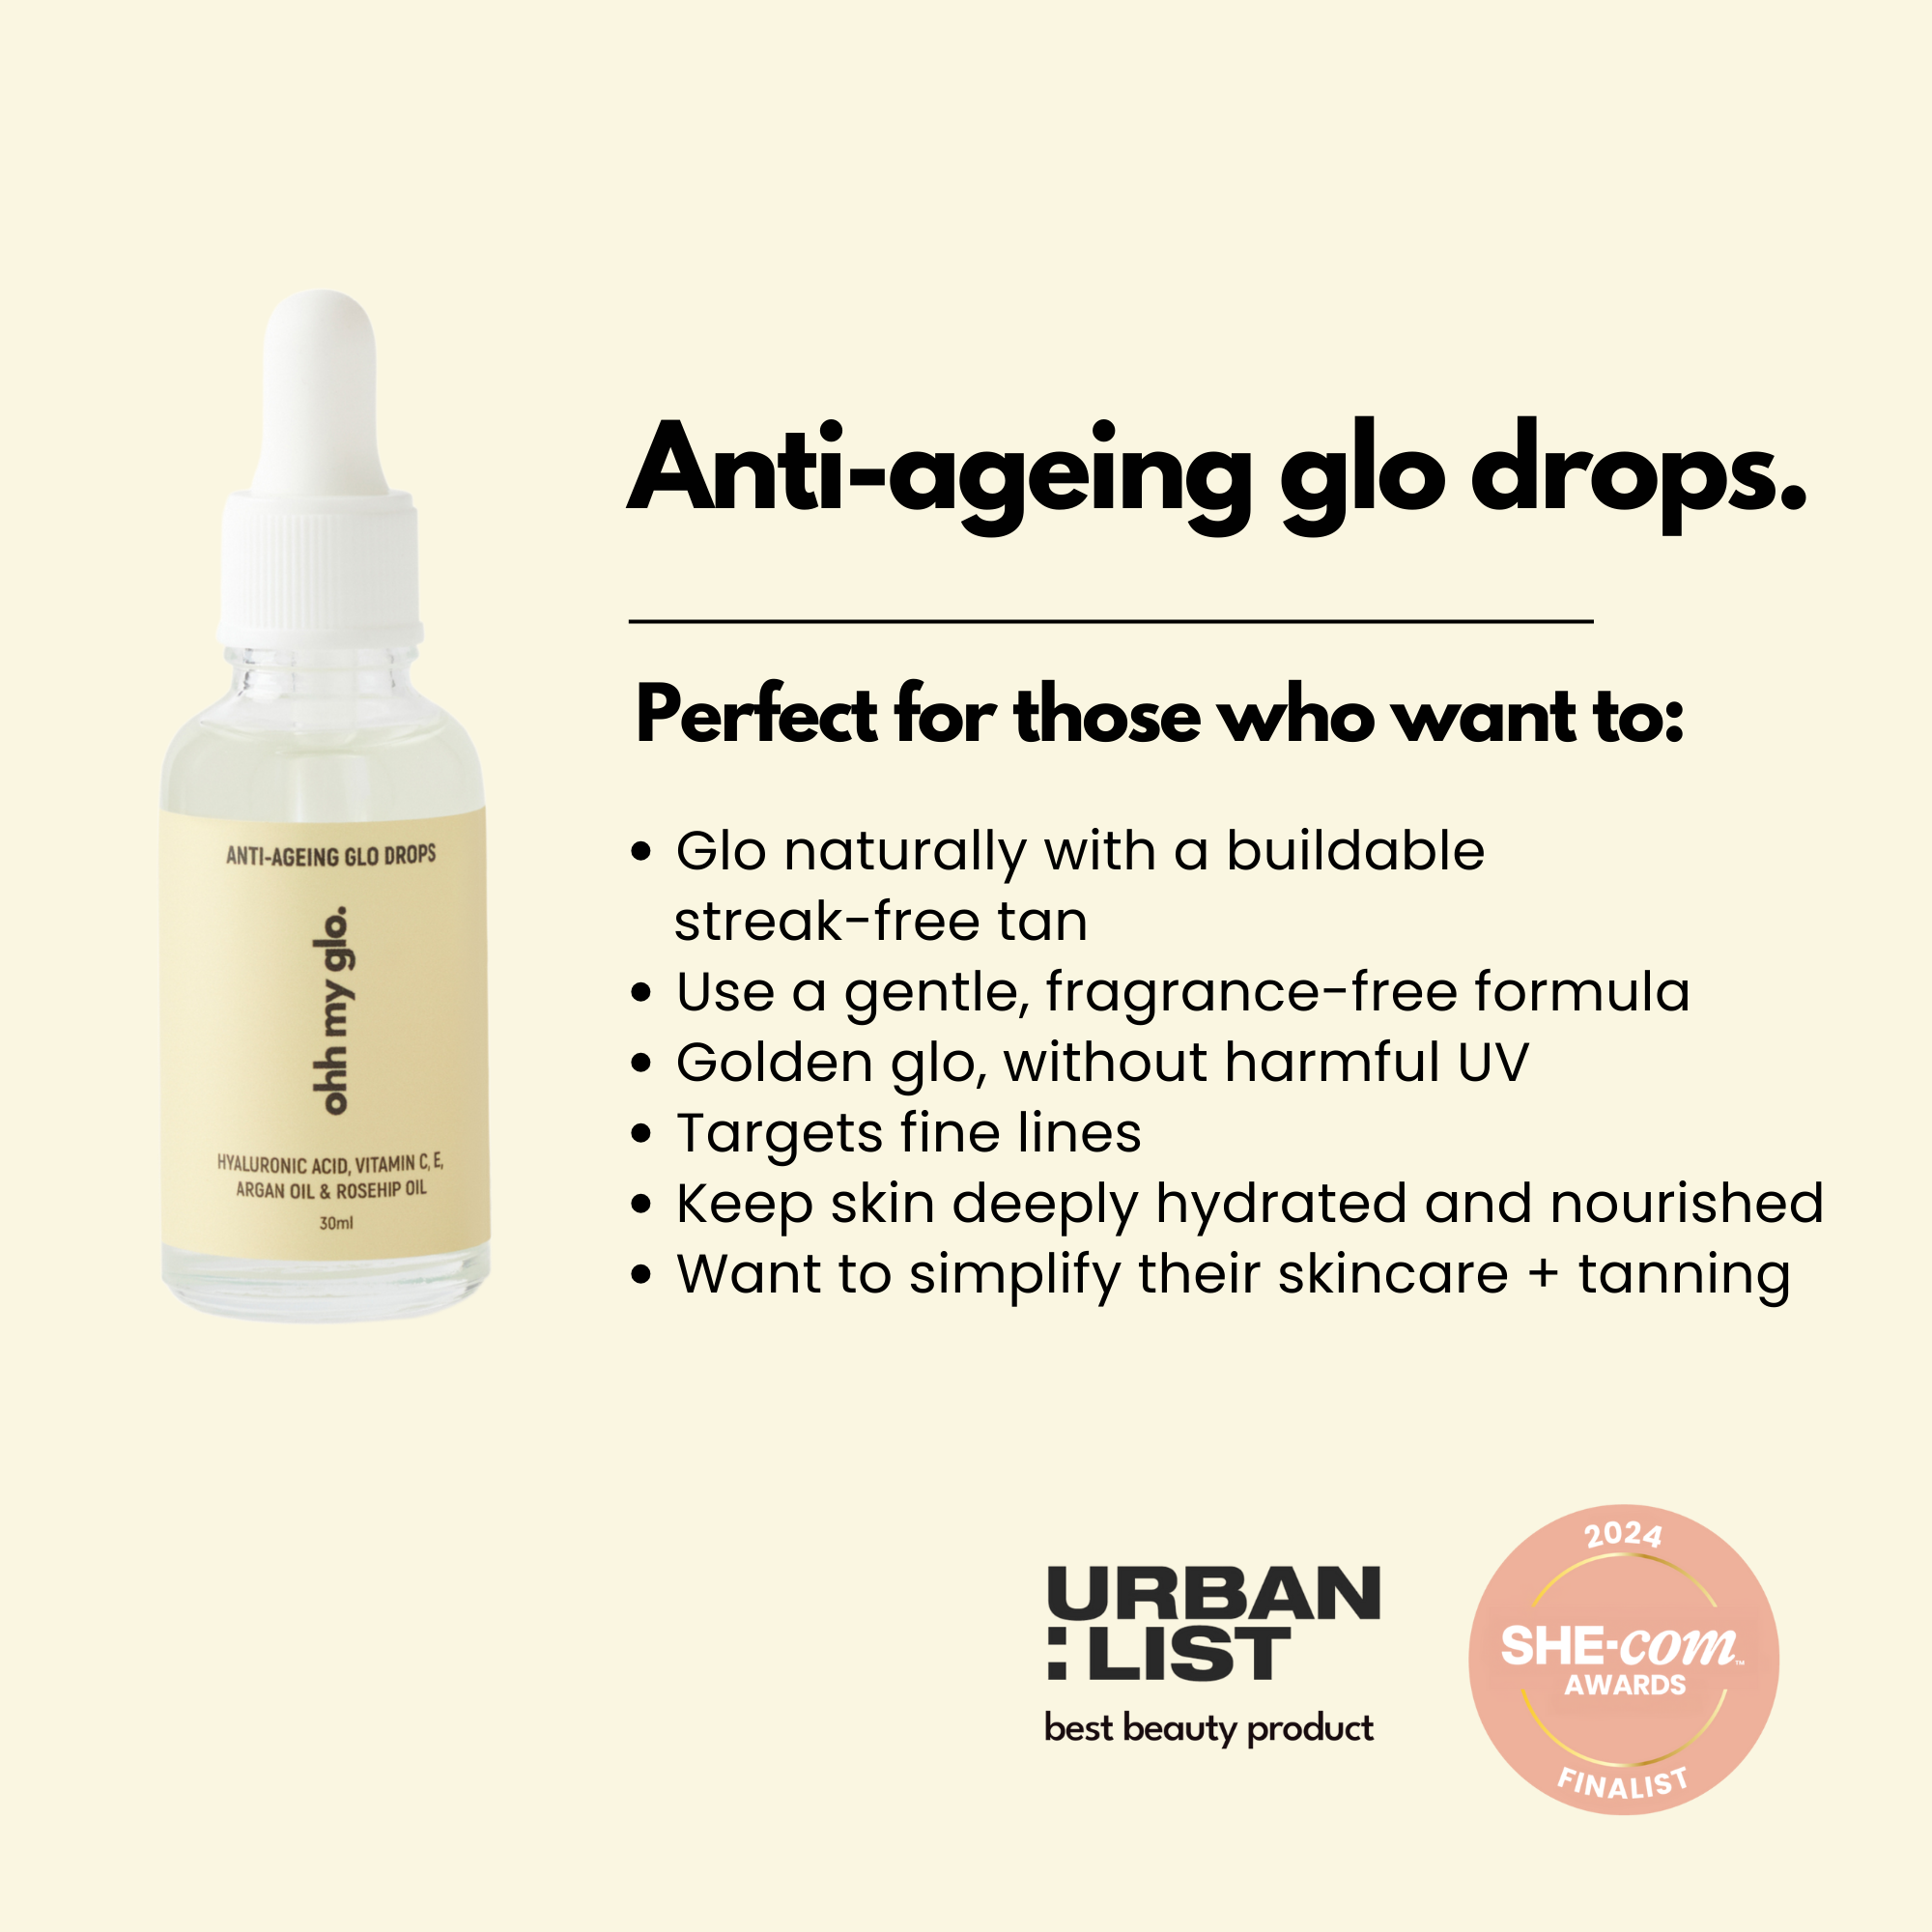
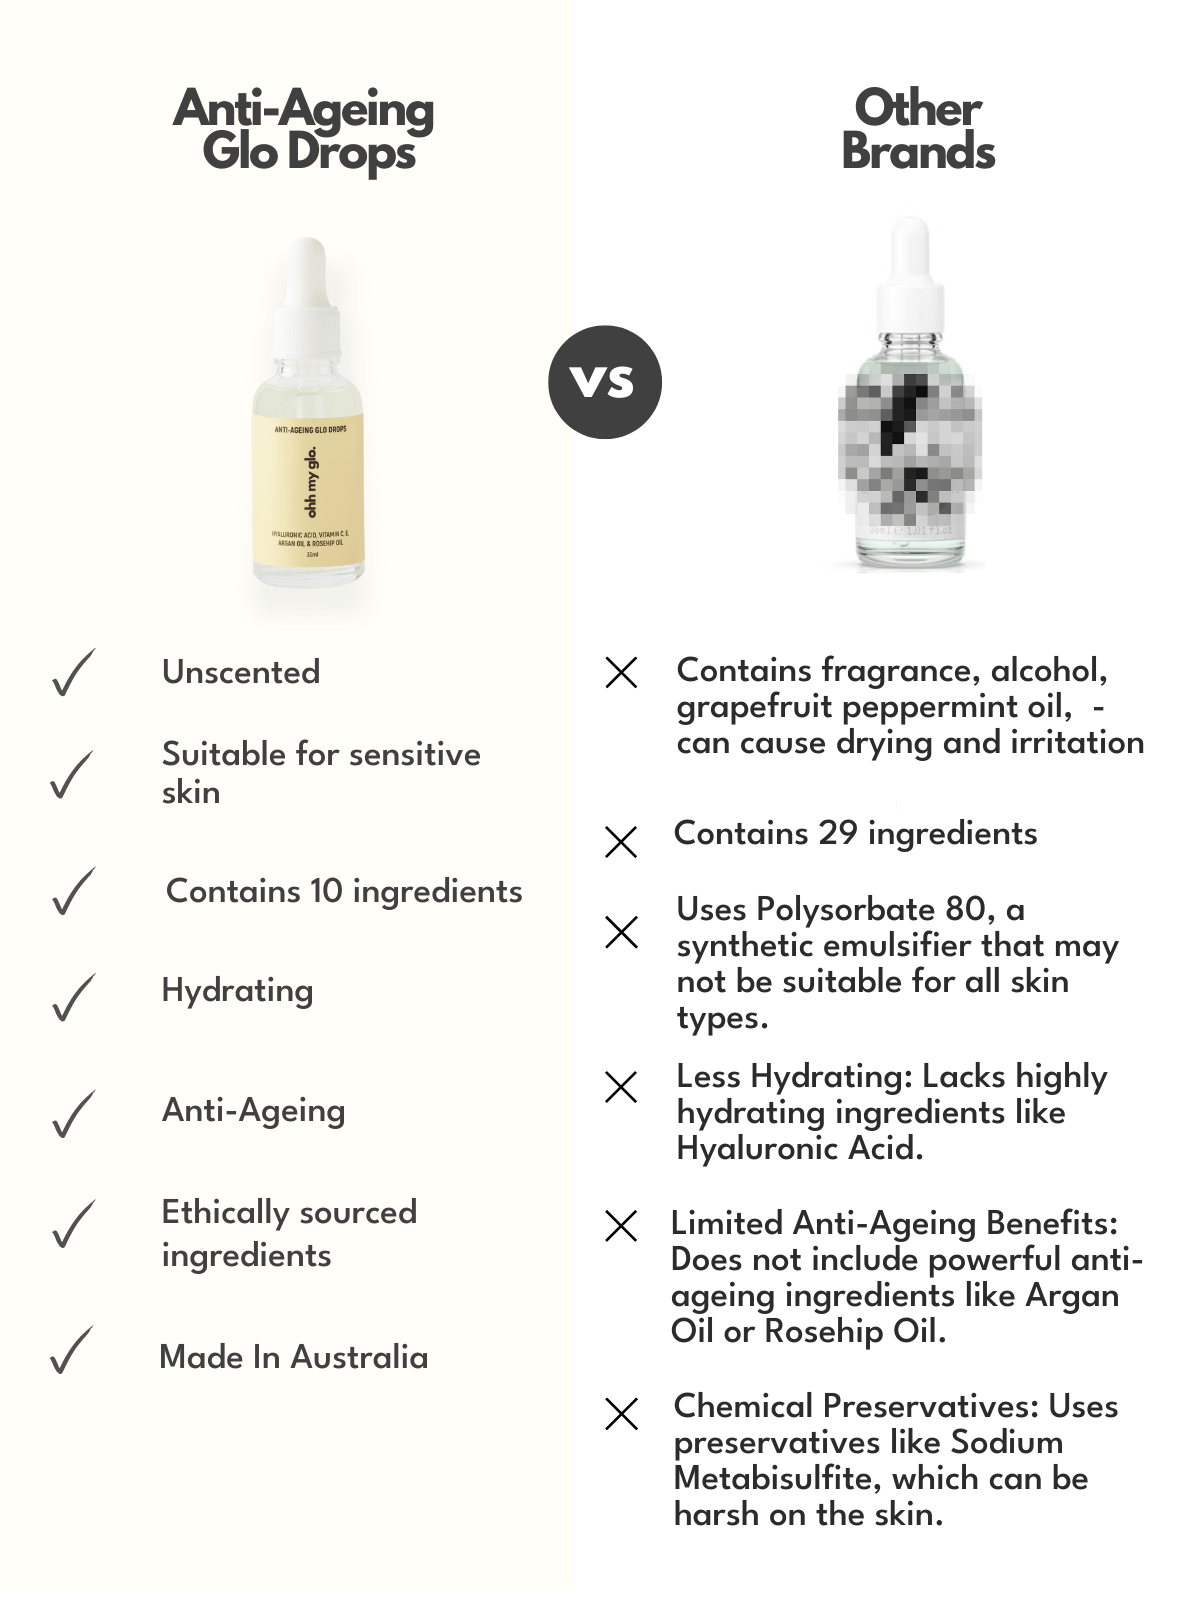
Why does fake tan go patchy
Zoe KleinWhy Does My Fake Tan Go Patchy?
Understanding the Patchy Tan Problem
Achieving a flawless self-tan or spray tan is the goal. But quite often we end up with blotchy, streaky, uneven colour - a patchy tan. Here are the most common reasons why a fake tan can go wrong:
-
Poor skin prep – If the skin surface is rough, dry or has old tan leftover, your self-tanner won’t sit evenly.
-
Dead skin build-up / uneven skin texture – Dry patches, rough areas like knees, elbows, ankles absorb more product or hold the colour more easily, causing darker spots.
-
Products on the skin acting as a barrier – Underarm deodorant residue, perfume, oil-based moisturiser or body lotions can stop the tanning solution from bonding evenly.
-
Application technique issues – Missing spots, applying too heavily, not blending properly, or rushing the process can all lead to patchy or streaky results.
-
Skin hydration and after-care – If the skin becomes very dry, or you skip moisturising, the tan may fade unevenly or the colour may settle in unwanted zones.
Understanding these root causes helps you fix and prevent patchiness — so you get that smooth, even glow your customers are after.
How to Prevent Patchy Fake Tan
Here’s a step-by-step checklist you can use (and adapt for your brand’s content) to help users avoid patchy self-tans.
1. Prep Skin Properly Before Self-Tanning
-
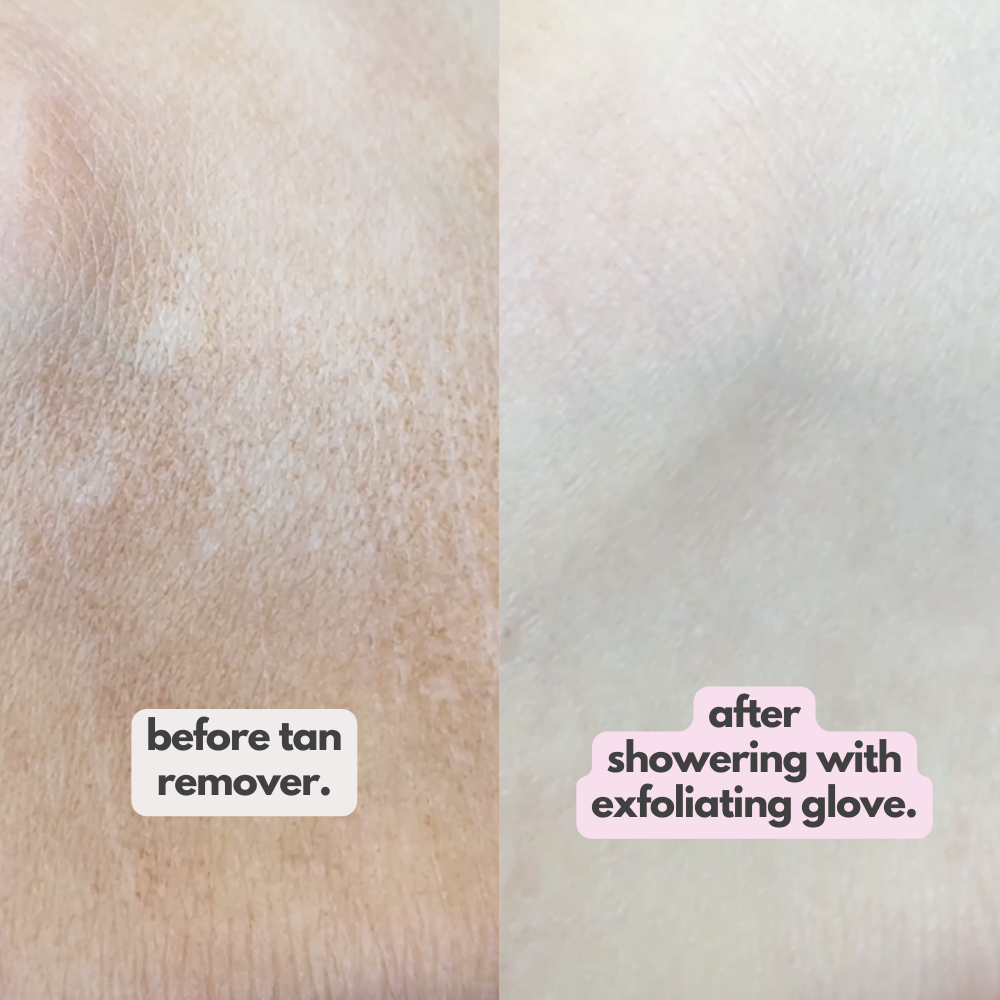
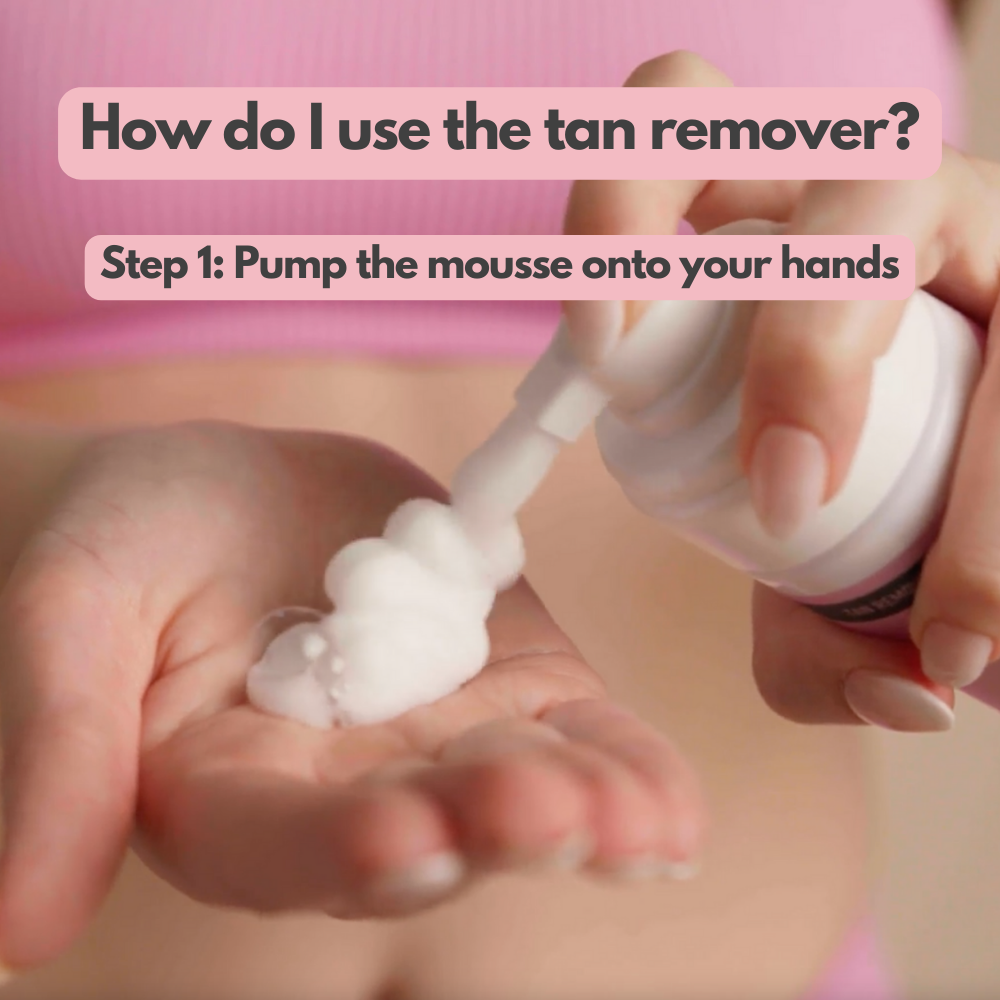
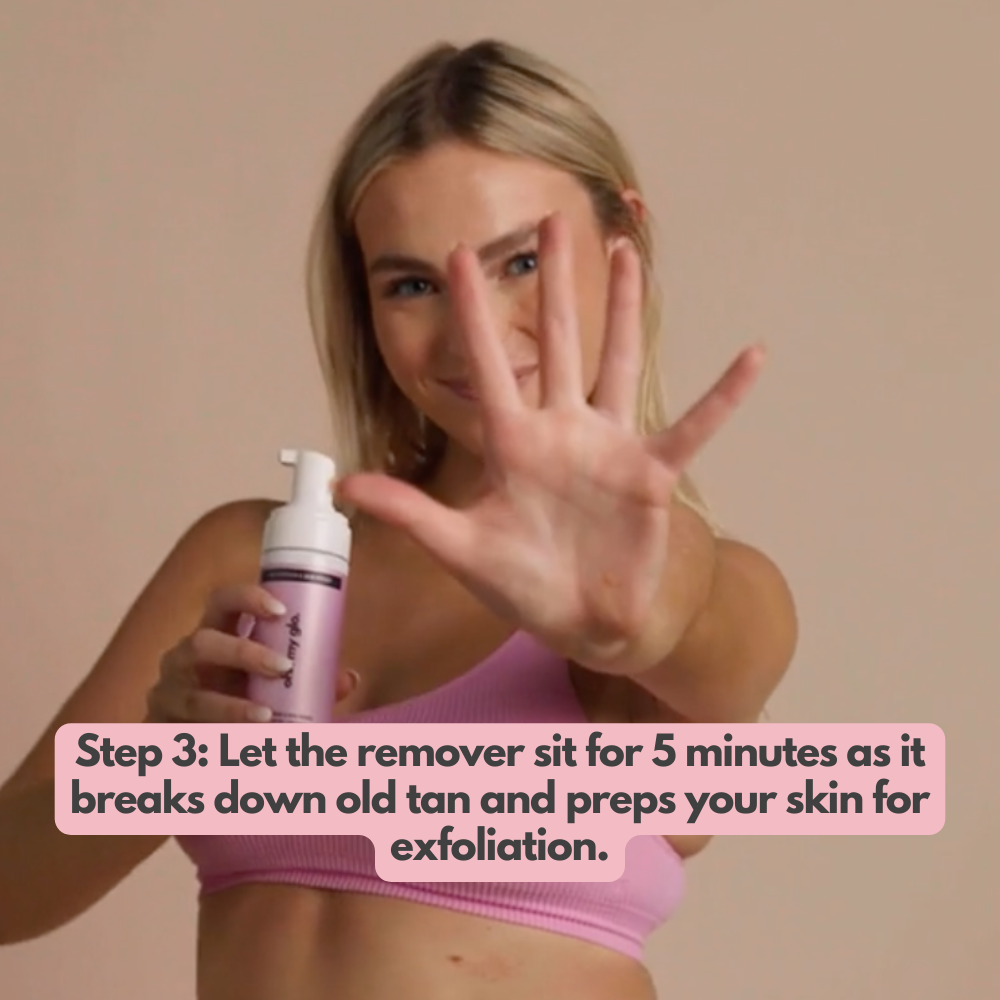
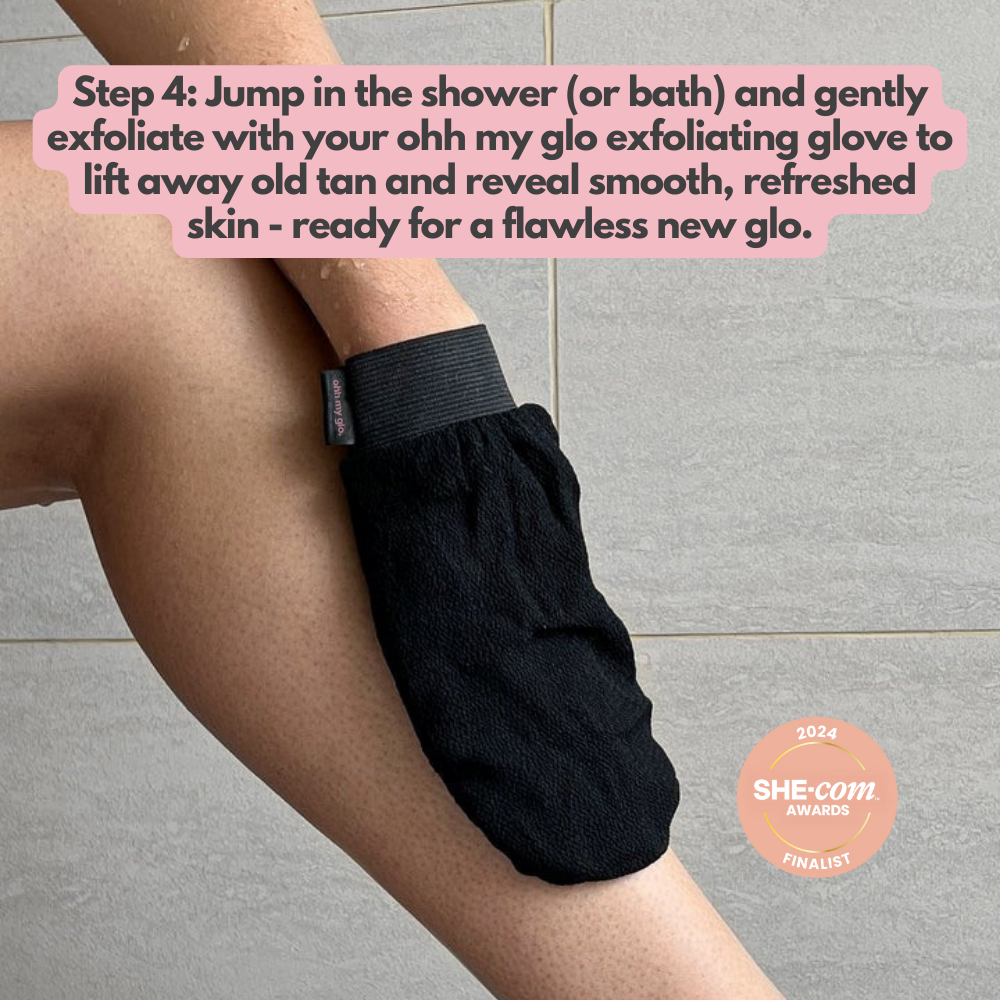
Exfoliate the body 24-48 hours before applying self-tan or receiving a spray tan with the ohh my glo tan remover and exfoliating glove. This removes dead skin cells and will give you the best chance for smooth skin and an even looking tan.
-
Remove all old/ excess fake tan. Applying new self-tanner over old pigment is a recipe for uneven results.
-
Focus on rough, dry areas: elbows, knees, ankles, wrists - moisturise these first with a light, oil-free lotion so they don’t soak up too much tan.
-
Ensure skin is completely dry before you begin applying. Moist or wet skin = uneven absorption.
2. Use the Right Application Technique
-
Use the ohh my glo tanning mitt so you have control and even coverage. Good technique helps avoid streaks and missed spots.
-
Apply in sections, working from ankles upwards, using circular motions to blend.
-
Don’t overload the product in one spot. A heavy layer can build up and then fade unevenly.
-
For tricky areas like hands, wrists, fingers it's best to go light in these areas. Use the ohh my glo blending brush with the tiniest but of tan to help buff and blend in these areas. Tan on the hands can build up quickly and we all know that orange tans are not cute.
- Go easy on areas with thicker skin like elbows, knees, underarms and inner thighs as the tan can stick more to these areas causing build up.
3. Aftercare to Ensure an Even Fade
-
Moisturise daily with a non-oily body lotion. Hydrated skin holds colour more evenly and prolongs the glow.
-
Avoid heavy sweating, hot baths/showers, or exfoliating too early which can break down the tan unevenly.
-
If you spot any darker patches or missed lighter spots: buff dark areas gently with the ohh my glo exfoliating glove;
What to Do If a Tan Has Already Gone Patchy
Even the best-planned tan can misbehave. Here’s how to rescue it:
-
For darker patches: Gently exfoliate using the ohh my glo exfoliating glove; to lift excess product or pigment. Use a wash-cloth, mitt or tan eraser.
-
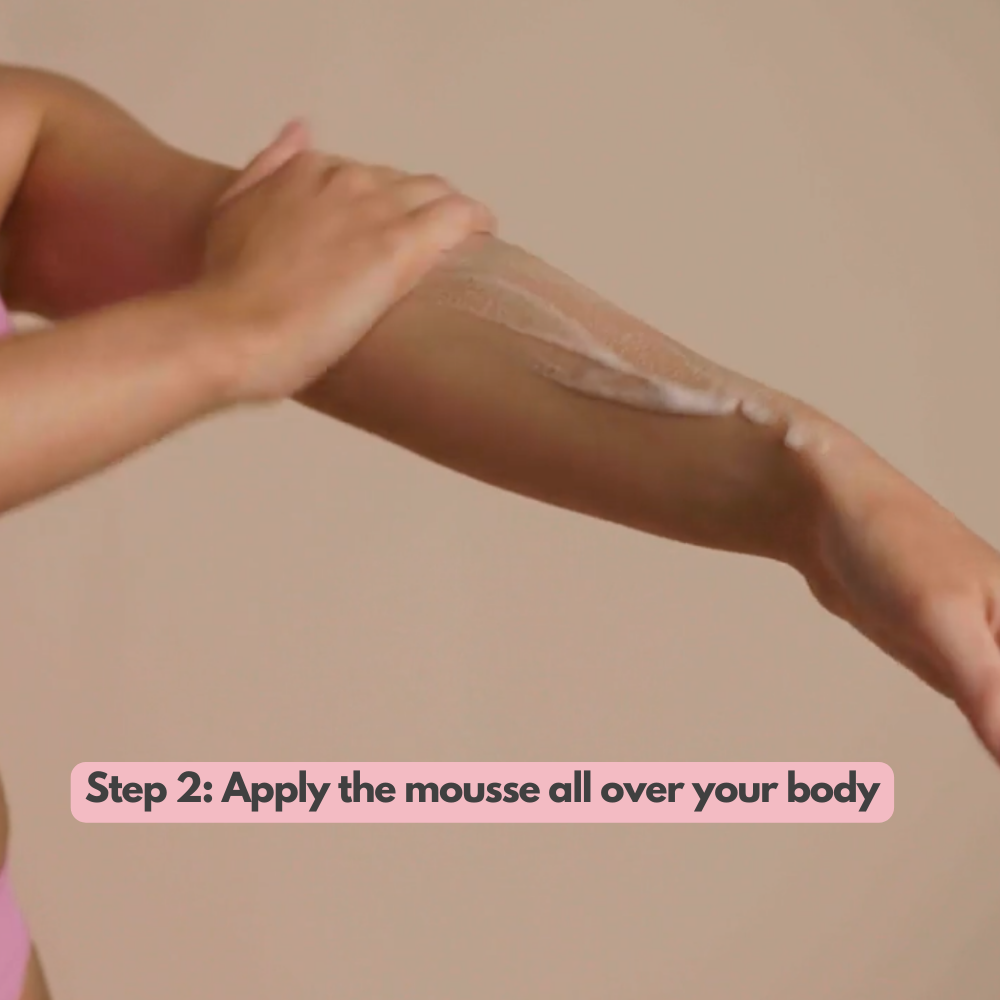
For missed or lighter spots: Apply a touch of self-tanning mousse or lotion on those zones. Use a brush or mitt to keep it controlled.
-
If it’s a major fail: Remove the existing tan fully using the ohh my glo tan remover and exfoliating glove, then start again with proper prep and application. Starting fresh is sometimes the quickest fix.
Product Recommendations
For your best chance at a flawless, long-lasting tan, we recommend using these Ohh My Glo essentials before, during, and after tanning:
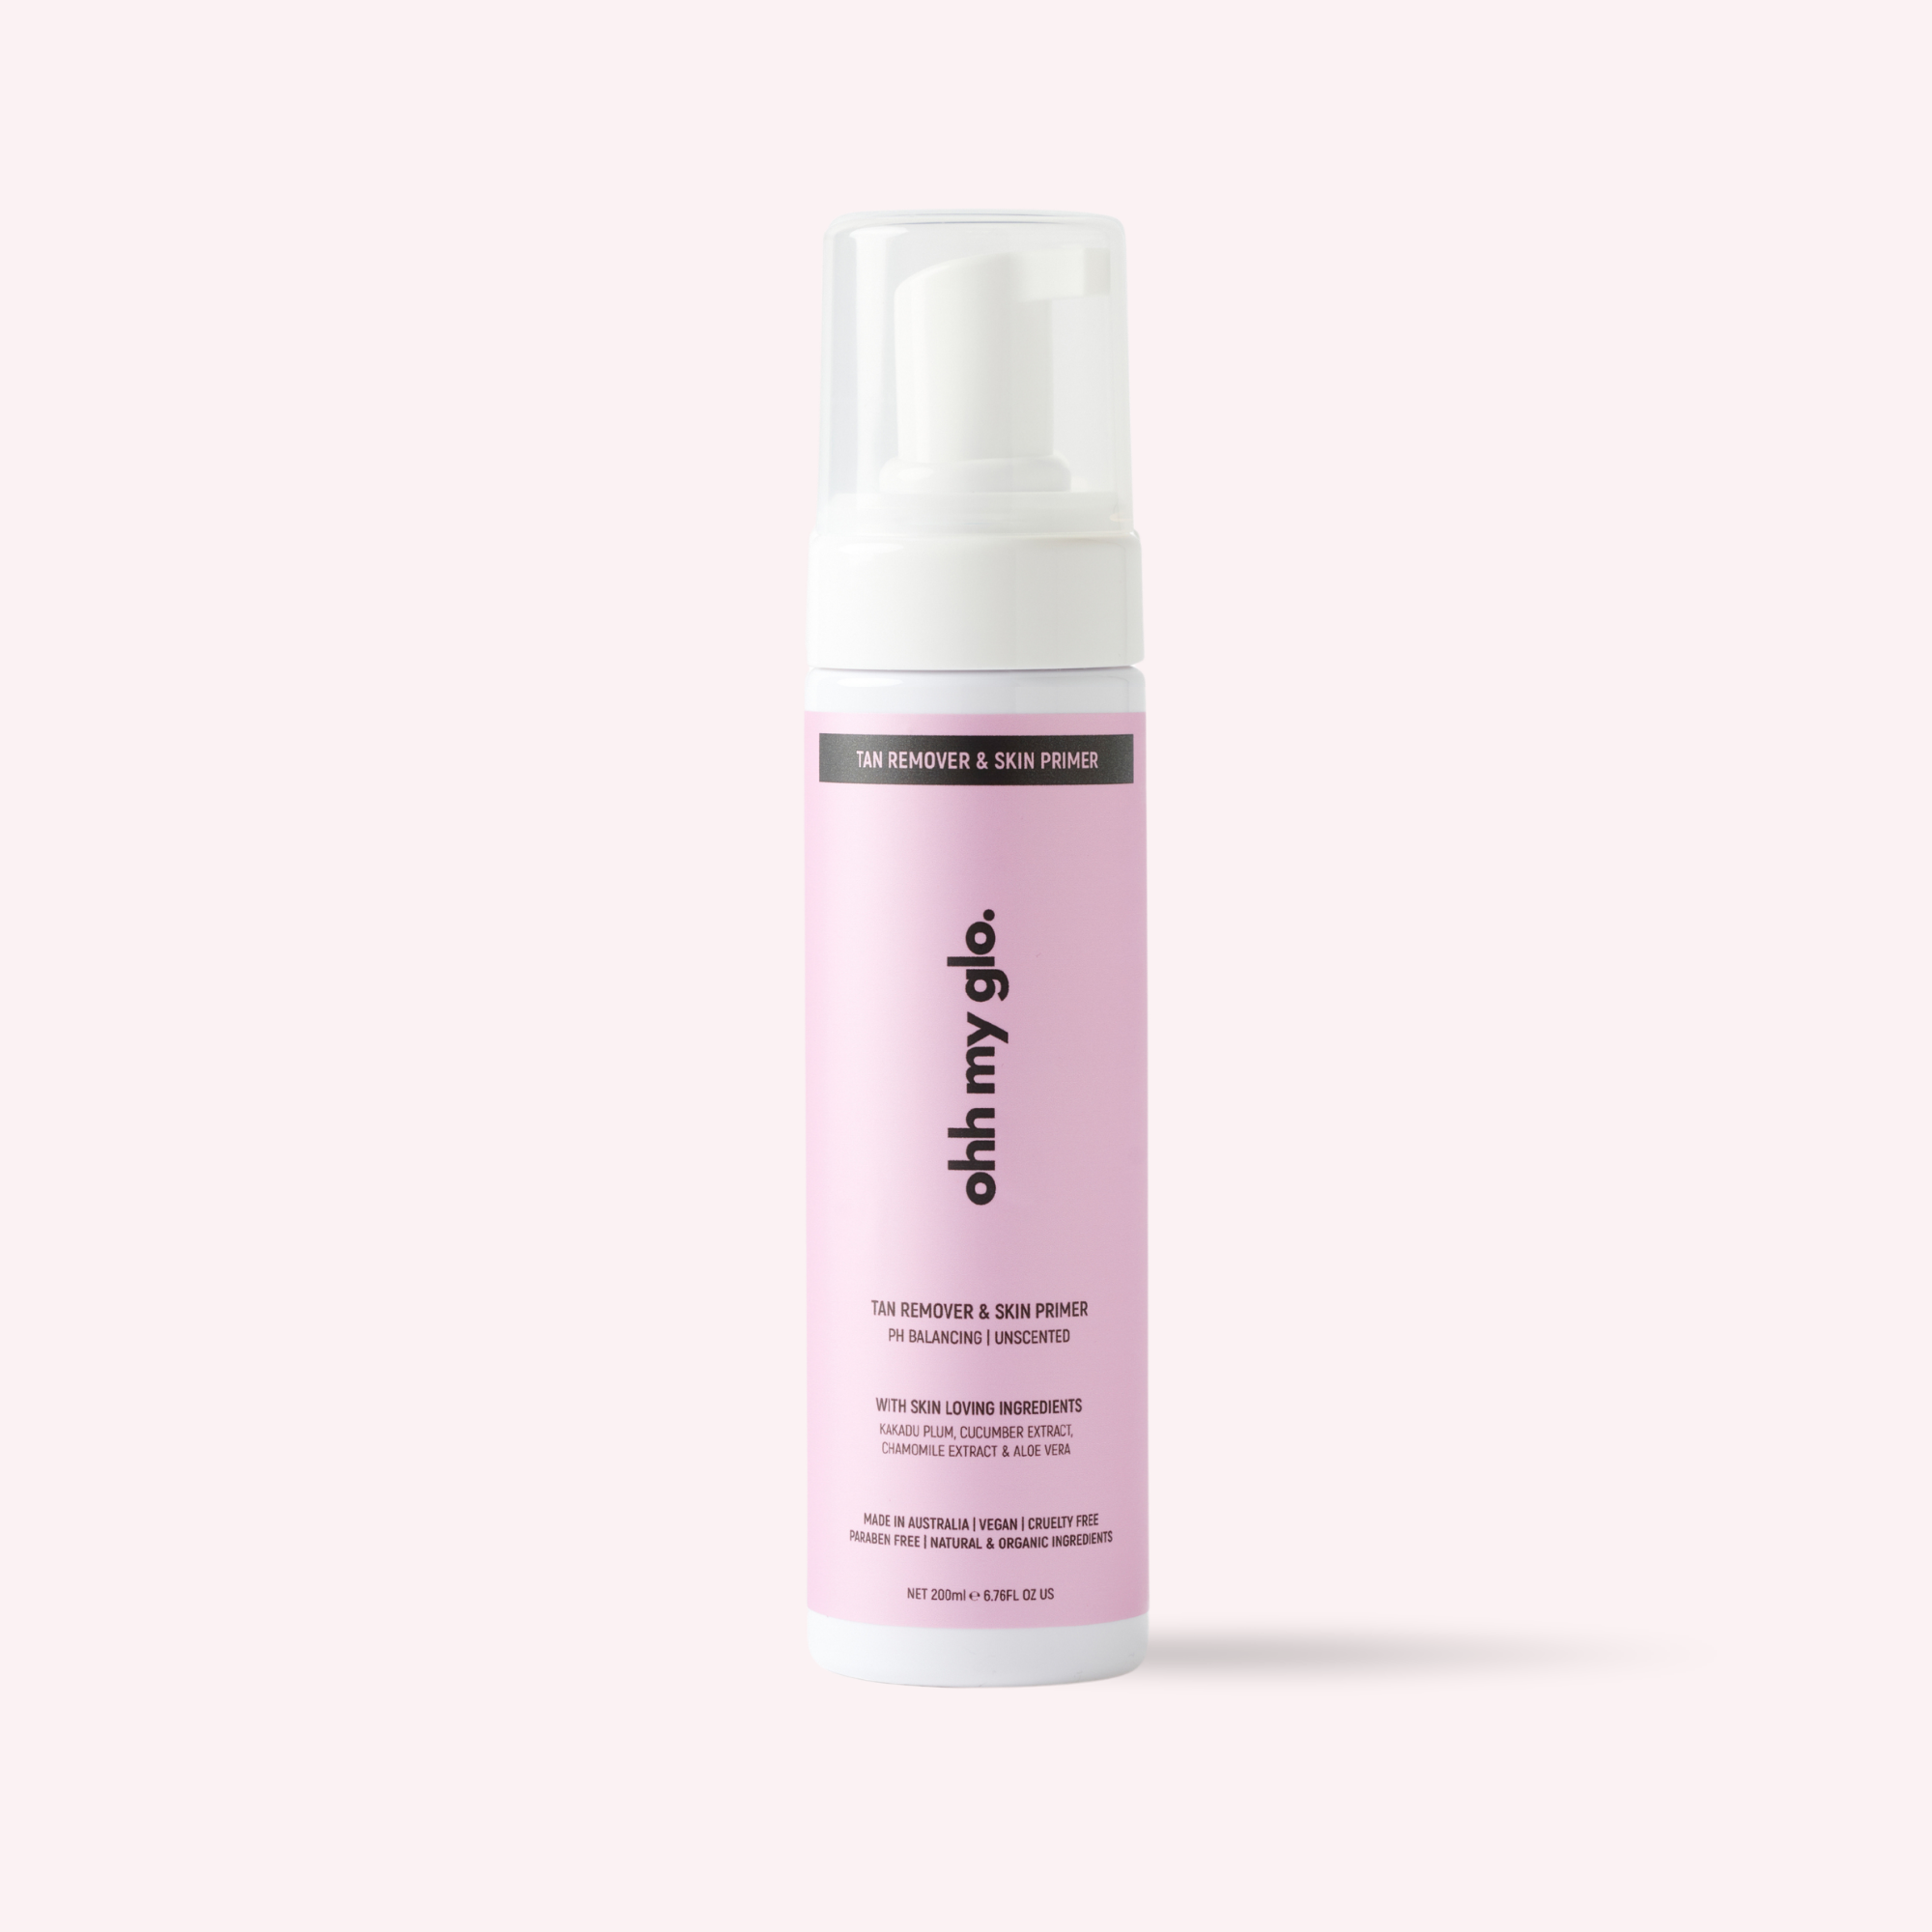
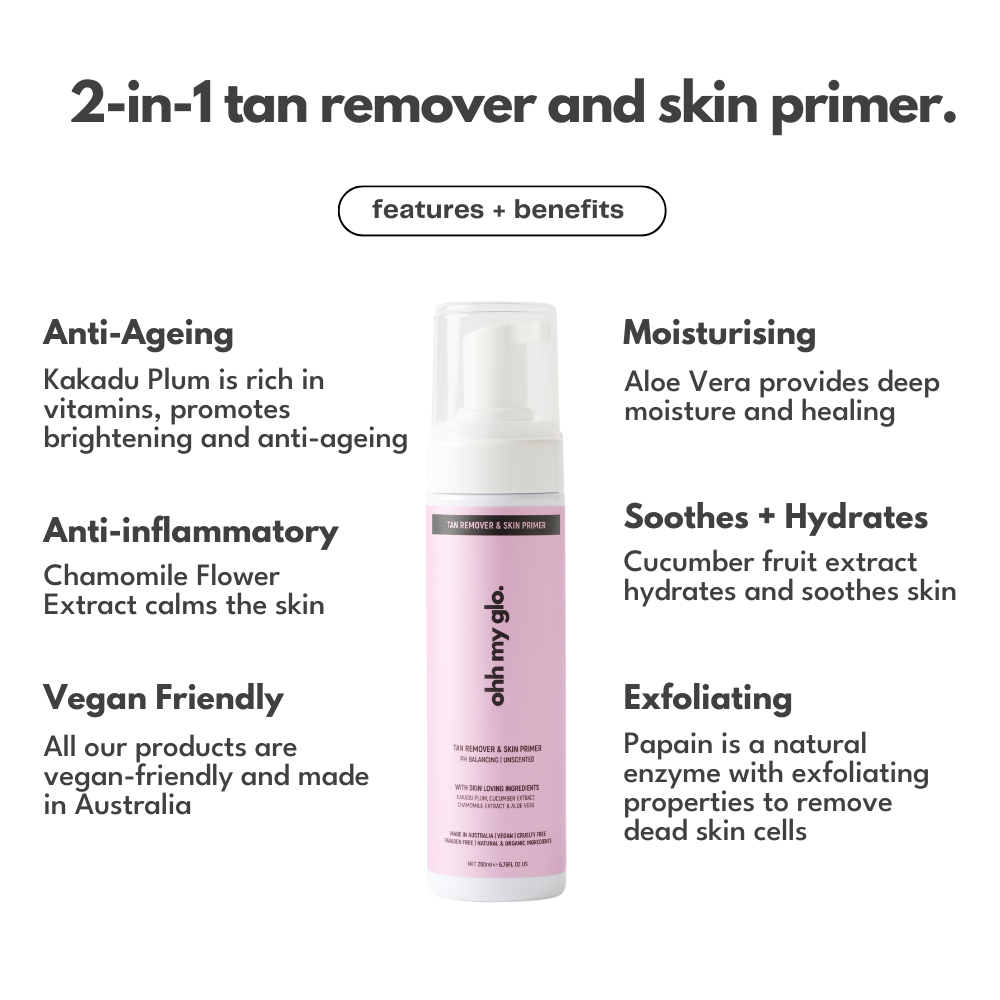
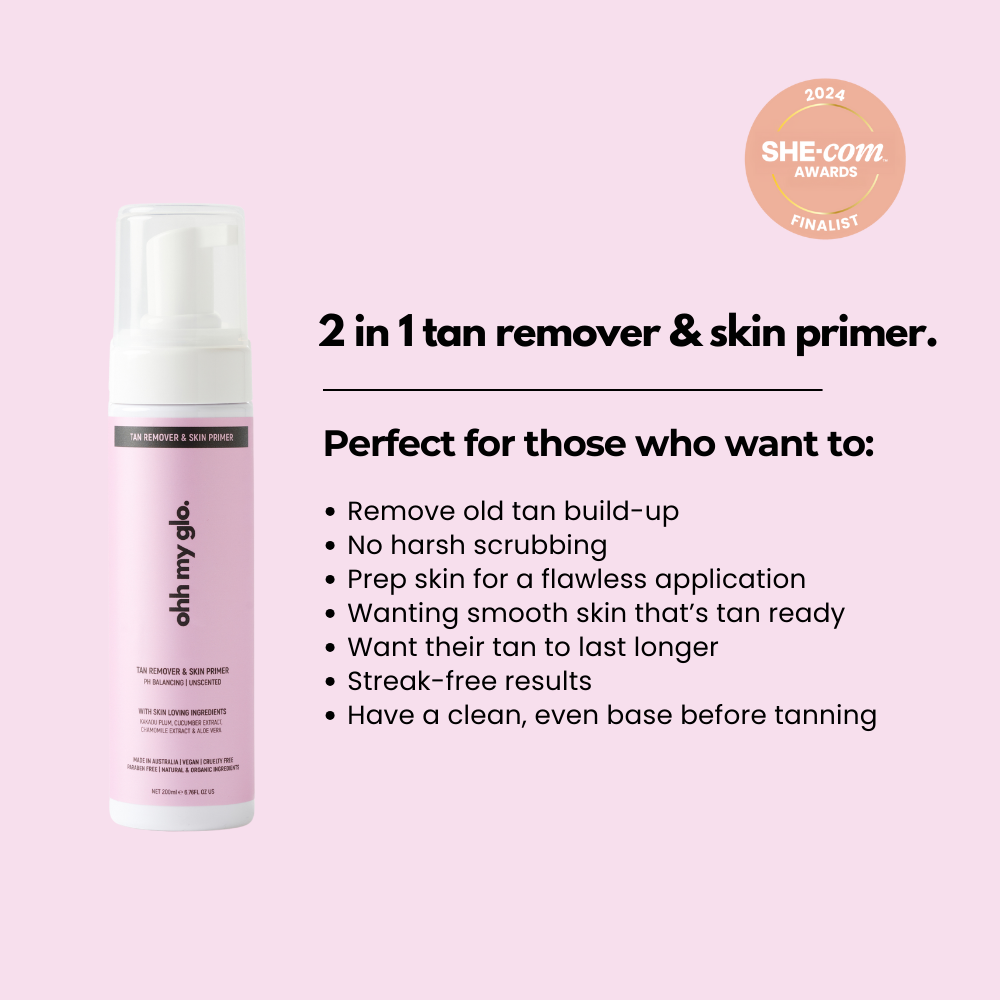
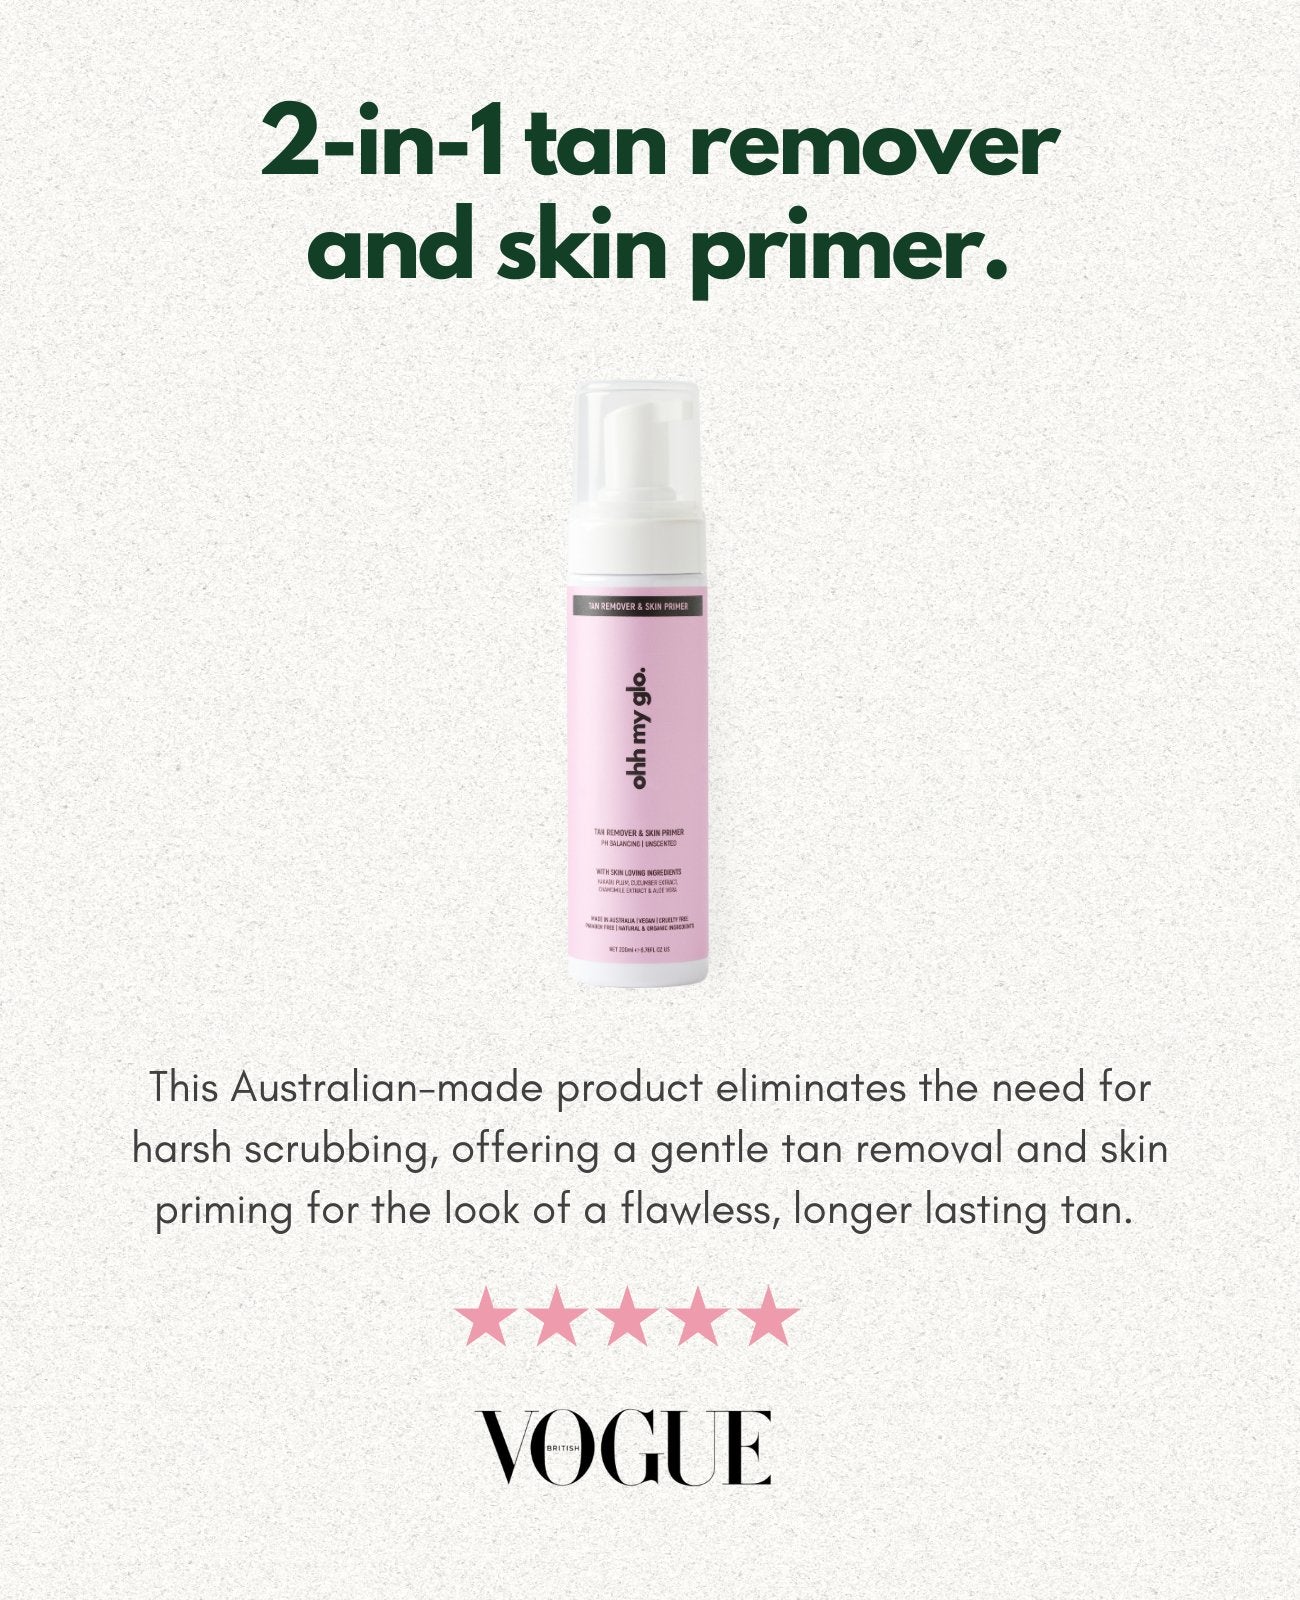
1. Ohh My Glo Tan Remover & Skin Primer
Start with a clean, fresh base. Our 2-in-1 Tan Remover & Skin Primer gently erases old fake tan while balancing your skin’s pH for a smooth, streak-free application. It’s enriched with Kakadu Plum, Chamomile Extract, and Aloe Vera — the perfect prep step before any self-tan.
2. Ohh My Glo Exfoliating Glove
Buff away dead skin and stubborn old tan to create an even canvas. This glove works hand-in-hand with the Tan Remover for best results and ensures your self-tan glides on evenly.
3. Ohh My Glo Colour-Correcting Self-Tan Mousse
Choose your shade and base tone for a custom glow that suits your skin. The green base helps counter pink and red undertones, while the purple base neutralises yellow or olive tones - for a natural, sun-kissed finish every time. Take the tan quiz to find the perfect tan for you.
4. Ohh My Glo Deluxe Tanning Mitt & Kabuki Blending Brush
Apply and blend like a pro. The ultra-soft mitt gives even coverage without streaks, while the kabuki brush perfects tricky areas such as wrists, hands, and ankles.
5. Ohh My Glo Self-Tan Setting Spray
Lock in your glow and eliminate the sticky feeling. Our award-winning Setting Spray instantly dries your tan, prevents transfer to clothing and sheets, and leaves skin touch-dry, soft, and glowing.